A scroll progress bar is a visual indicator that shows how far a user has scrolled down a web page.
In this tutorial, we are going to create one for ourselves in React.
To display the current scroll percent we need to get the total scroll height and currently scrolled position and that’s what we are going to do in this tutorial.
Let’s start by setting up our project.
Project Setup
As we are building a progress bar for React we need a React app already set up, in case if not you may create a new React or Nextjs project.
In my case, I already have created a React app with Vite, but don’t worry how you create your app has nothing to do with this tutorial We are mainly focusing on the ProgressBar component rather than whole app.
This is how my project looks right now.
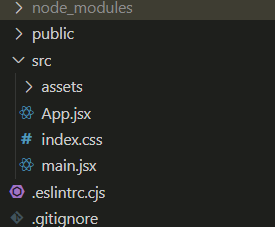
Currently, only two files are useful for us App.jsx and main.jsx
Here’s how App.jsx looks like
function App() {
  return (
    <>
      <div className="app text-center">
        <h1 className="text-8xl">Tutorend</h1>

        <p>Welcome to React Tutorials by Tutorend</p>

        <p className="text-2xl">
          Lorem ipsum dolor sit amet consectetur adipisicing elit. Nesciunt,
          ipsam assumenda maiores amet itaque voluptate necessitatibus eveniet
          ipsum perferendis. Quasi officiis eius corrupti modi optio laborum
          aspernatur cum. Vel, debitis!
        </p>
        <p className="text-4xl my-8 ">Hello Coders!</p>
        <p className="text-4xl my-8 ">Hello Coders!</p>
        <p className="text-4xl my-8 ">Hello Coders!</p>
        <p className="text-4xl my-8 ">Hello Coders!</p>
        <p className="text-4xl my-8 ">Hello Coders!</p>
        <p className="text-4xl my-8 ">Hello Coders!</p>
        <p className="text-4xl my-8 ">Hello Coders!</p>
        <p className="text-4xl my-8 ">Hello Coders!</p>
        <p className="text-4xl my-8 ">Hello Coders!</p>
        <p className="text-4xl my-8 ">Hello Coders!</p>
        <p className="text-4xl my-8 ">Hello Coders!</p>
        <p className="text-4xl my-8 ">Hello Coders!</p>
        <p className="text-4xl my-8 ">Hello Coders!</p>
        <p className="text-4xl my-8 ">Hello Coders!</p>
        <p className="text-4xl my-8 ">Hello Coders!</p>
        <p className="text-4xl my-8 ">Hello Coders!</p>
        <p className="text-4xl my-8 ">Hello Coders!</p>
        <p className="text-4xl my-8 ">Hello Coders!</p>
      </div>
    </>
  );
}

export default App;
As you can see there’s nothing important in the App component, just enough dummy content to make the page scrollable so that we can show scroll progress.
and here’s what main.js looks like
import React from 'react'
import ReactDOM from 'react-dom/client'
import App from './App.jsx'
import './index.css'

ReactDOM.createRoot(document.getElementById('root')).render(
  <React.StrictMode>
    <App />
  </React.StrictMode>,
)
Just the default code, but later we are going to import the progress bar component in this.
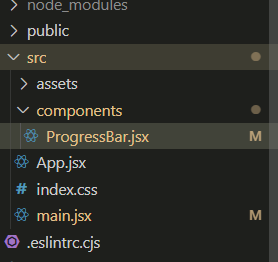
Creating ProgressBar component
Now I am going to create a new component for showing the progress bar, in the src/components folder.
Here’s the initial code for ProgressBar
import React from 'react'

function ProgressBar() {
  return (
    <div>ProgressBar</div>
  )
}

export default ProgressBar
Now we are going to create two divs in this component, one for progress-container and the other for progress-fill.
Progress-container: This is going to have a width of 100% and act as the container for the dynamically changing progress bar.
progress-fill: Initially the width of the progress fill is going to be 0 and while we scroll well programmatically change the width of the bar as we decrease or increase.
Let’s see this
<div
      id="progress-container"
      style={{
        height: "8px",
        width: "100%",
        backgroundColor: "#d1dced",
        position: "fixed",
        top: "0",
        left: "0",
        right: "0",
      }}
    >
      <div
        className="progress-fill"
        style={{
          height: "100%",
          backgroundColor: "blue",
          width: `${scrollPercentage}%`,
        }}
      >

      </div>
As you can see we have set the progress bar to be fixed on the to,
Set the background color of the progress container to gray and the progress fill to blue.
Also in progress fill instead of width value, we are using a variable by using template literal ( backticks), This variable is going to be a state in which the value is going to be changed dynamically when we scroll.
Now let’s see how we gonna do it.
First, we have to create the state/ variable with the name scrollPercentage.
const [scrollPercentage, setScrollPercentage] = useState(0);Now I am going to add an event listener to detect when we scroll and change the state according to the current scroll position
We have to do it inside the use effect as we need to access the window properties.
  useEffect(()=>{

    window.addEventListener("scroll", handleScroll);

    return()=>{
        window.removeEventListener("scroll", handleScroll)
    }

  },[])
In the above code, you can see I have added a scroll event listener which calls a function handleScroll upon scroll, In return you can see I am removing the event listener to avoid memory leaks as useEffect may run several times.
now let’s write the handle scroll function
  useEffect(()=>{

    const handleScroll = ()=>{
        const windowHeight = window.innerHeight;
        const documentHeight = document.documentElement.scrollHeight;
        const scrollY = window.scrollY;

        const scrollPercent = (scrollY / (documentHeight - windowHeight))*100

        setScrollPercentage(scrollPercent)
        console.log(scrollPercent)
    }


    window.addEventListener("scroll", handleScroll);

    return()=>{
        window.removeEventListener("scroll", handleScroll)
    }

  },[])
In the function, you can see I am getting and total height of the window and calculating the current scrolled percentage according to the current scroll position
In the function, you can also see that I am updating the scrollPercetage` variable state and now we have made the scroll progress bar dynamic.
Importing and using the ProgressBar component
Now we can import and use the component in any main components like Main.js or App.js or if you want this feature on any specific page then you can simply import and use this component on that specific page only, In my case I want his in the whole application so I am going to import it in main.js and use it inside the wrapper.
import React from 'react'
import ReactDOM from 'react-dom/client'
import App from './App.jsx'
import './index.css'
import ProgressBar from "./components/ProgressBar";


ReactDOM.createRoot(document.getElementById('root')).render(
  <React.StrictMode>
    <ProgressBar/>
    <App />
  </React.StrictMode>,
)
Now let’s see the result when we scroll.
Conclusion
Building the basic version of the Scroll ProgressBar component is very easy, but there’s a lot you can do with it like.
You can set it to any specific part of the page instead of just the top by changing the positions,
You can add more colors and animations
Basically, the possibility is endless and it depends upon your need.
I hope you learned something new from this tutorial, Happy coding.